8 Steps For Night Night-Training A Stubborn Child!
Do you have a stubborn bedwetting toddler that refuses to night-train no matter what you do?
Maybe they’re not so little, possibly age 7 and up? Does your child exhibit anxiety or embarrassment over their bladder?
Do you spend a fortune on pull-ups and constantly wash sheets or bed pads?
Well, not so long ago I was also a slave to constant sheet washing. Thankfully I found a tool that 100% cured my son’s bedwetting woes in precisely 3.5 weeks!
Yes, you read that right, 3.5 weeks.
If you’re sick of changing/washing sheets and ready to save your sanity keep reading. I’m going to show you my 8 foolproof tips for successful night-training!
Affiliate Disclaimer:
This post contains affiliate links. This means that if you click on any of my fun-little-links and purchase something, I'll make a small commision at no extra cost to you. It's a win-win for both of us right?

What You’ll Need
So let’s cut right to the chase; The one thing you MUST-HAVE for night-training a stubborn child is this Bedwetting Alarm (Amazon aff link). This product is worth its weight in gold. This alarm also comes with a progress tracking sheet with some stickers.
BTW: I’m not sponsored by this company, but I’ve had two kids successfully night train within 3-4 weeks of using their alarm.
I can’t help but sing its praises to all who will listen.
You’re also going to benefit from grabbing some Waterproof Bed Pads (Amazon Aff Link) but more on that later.
Now please continue to read because there’re a few key rules you need to follow in order to succeed. I’m going to be going over all of the steps along with the mistakes I made when night training my first time.
In this post, I’m going to tell you how we successfully potty-trained our first child (who constantly wet the bed) and the exact steps we took to make this program 100% successful.
If you’re child struggles with sensory issues, or has special needs you may want to consult with their pediatrician before starting this program.
Since I love my nesties, I’ve put together a special set of FREE downloads to help you in your night-training endeavors!
I’ve included a fun progress tracking sheet that you can use to help motivate your child, my quick 8-step night-training hacks, and two big-kid underwear themed coloring sheets/cutouts!
The Story Of My First Little Bedwetter
My first child Asher was such a deep sleeper that nothing I ever did to night-train worked on him.
I kept thinking he’d eventually stop wetting the bed on his own. All of my friend’s kids were sleeping in regular underwear and had little to no issues.
Asher used the potty during the day just fine he actually potty-trained within a week at two in a half. (Guide to potty-training coming soon) However, night-time was a completely different story.
We tried all the things
We did all of the typical tips you read online and I took advice from other moms in various mommy-themed Facebook groups.
Drinks were no longer given past 6 pm and surprise, surprise, he’d still wet the bed. It’s almost as if his body produced more water to make up for what we didn’t give him. 😒
This also started causing issues because he would get genuinely thirsty some nights after playing. We eventually let him have a few sips of water before bed.
He Could Not Be Bribed
We tried bribing him and offering toys and cash if he’d wake up dry. That never worked either, in fact, one time Asher responded with “I have enough money and toys!” Then he continued to nonchalantly play video games while I tried not to laugh and cry.
We also tried waking him up at 10 pm or before we went to bed. This was very disruptive and a pain in the butt to get him to wake up.
Even after all of this, he’d somehow magically summon enough water to soak the bed!
The White Flag
Eventually, After washing tons of sheets we gave in and put him in overnight pull-ups.
Now I tried using the reusable ones from GroVia (aff link) but he outgrew them and would soak-through even with extra absorbent inserts.
I believe at one point I brought up my concern to his pediatrician and was told the basic tips and that some kids are just heavier sleepers than others.
Things Had To Change
One day I was browsing for new pull-ups online as Ashers were getting too snug on him. And I couldn’t find any pull-ups that went from 5t and up. Everything was 2t to 3T, 3t to 4t, and 4t to 5t.
I kept searching and searching then I saw the next sizes up were geared towards kids with incontinence issues or special needs.
Asher was 5 years old at this point and I realized I had to get him out of pull-ups as he wasn’t going to learn on his own. He was starting to soak his sheets every single night. Even in his pull-ups and showed 0 signs of slowing down.
With three kids this was just beginning to be a massive headache. I also hated him wearing disposables so I went to the trusted inter-webs aka Google And looked for alternative solutions.
The Answer was Right in front of me
I then discovered the holy grail of night training; the bedwetting alarm system on amazon. I read review after review and everyone swore by this thing.
I read about one kid who was older and even embarrassed to sleep over at other kid’s houses because he kept wetting the bed. They used this alarm system and within a few weeks, he was sleeping through the night.
At this point, desperation had settled in. I was willing to buy anything that offered a glimmer of hope.
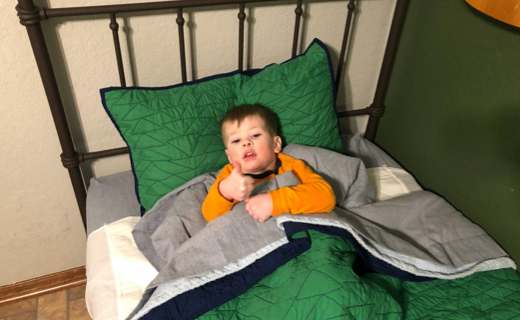
Click the image above to play the video.
How The Bedwetting Alarm Works
So basically this device straps onto the child’s arm with velcro and has a wire that protrudes down with a sensor at the end. The end of the wire with the sensor clips directly to the front of the underwear.
After everything is in place you can put their PJs back on. I recommend long sleeves to help keep the sensor in place on their arm.
Once the sensor gets wet it sounds the alarm which is super loud and obnoxious. It then sends a horrifying shock to your child that bolts them out of the bed.
Just kidding guys, just making sure you’re paying attention! 😅
The alarm does however vibrate and has different alarm settings In case your kid gets used to the sound of one of the alarms.
The set I received came with a little tracking chart and stickers for keeping score of your child’s progress.
The first night after we strapped it on Asher actually stayed dry. I think it’s because he was so focused on it he didn’t pee. We proudly put the sun sticker on his chart that next morning.
Sun stickers are for dry days, partially sunny stickers are for slight accidents and rainy stickers are for full-on bed-soaking accidents.
Like I mentioned earlier, I’ve also created my own progress chart that you can download and print for free.
SIGN UP HERE TO GRAB YOURS
Possible Reasons Your Child Hasn’t Trained
Some children’s brains never send the signal to the body to wake up when they urinate.
So the idea behind the bedwetting alarm is to help the child link the sound of the alarm with the internal signal in the body.
Eventually, they need less and less alarm as their brain begins to send a stronger signal and they begin to wake up.
This is the reason I suspect Asher never woke up at night even if he soaked the bed.
Another possibility could be that your child is comfortable wearing pull-ups so they don’t try to go to the potty. I feel like my second child Abram fell more into this category.
The Proper Night-Training Steps
Now I believe this is supposed to be a 6-12 week program but your child could train earlier than that. It all depends on the child and how dedicated you are to following the right steps.
You also have to work with your child correctly or this thing will NOT work.
As a matter of fact, I started to think it didn’t work after two weeks. I went back and read the reviews on the alarm and realized I was doing some things wrong which were hindering Asher’s progress.
After I fixed those issues (which we will discuss in a moment) Asher began improving almost instantly until he no longer needed the alarm.
As you can see below, Asher trained in about 3.5 weeks which wasn’t bad at all. At the 6 week mark, I stopped keeping track. Some days were not tracked because he was pretty sick. So we waited for him to feel better before continuing the program.
Abram’s progress was charted on the right side later on. Both of my kids trained in about the time time-frame.

Step 1: Explain The Process
On the first night of training, we explained to Asher exactly what was going to go down and how he’d no longer be wearing pull-ups. He was reminded that he now needed to use the potty and not go in his pants.
We showed him the alarm and how it worked. I licked my finger and touched the sensor to show him how loud it was. We also showed him the sticker chart and how he could earn prizes by earning Sun stickers.
Your child may not completely understand what’s about to happen, but let them know anyway.
Step 2: Set Up A Rewards System
If Asher was able to get two Sun stickers by staying dry at least two nights in that first week, we’d take him out to get ice cream.
If he earned more Sun stickers than required, we’d let him pick out a small prize on the following weekend as well.
With my second child, Abram, we’d reward him and the family with ice cream at Freddie’s every weekend as long as he earned the appropriate amount of Sun stickers through the week.
Each new week I asked him to stay dry more days in order to earn a trip to Freddies. In the end, when Abram continued to stay dry for over two weeks straight, he earned a New Scooter! (Amazon aff link)

Feel free to play around with the bribes and change up the rewards system. You could do ice cream one week, a small reward each day if they woke up dry, or one huge prize if they graduate the program.
The sky is the limit, just do what works for your child.
Step 3: Prepare The Area
Before you get ready to train your child make sure you get these Saddle Style Bed Pads (Amazon Aff Link) that go over the top of your sheets. Also, have an extra Waterproof Bed Pad (Amazon Aff Link) under your fitted sheet as an extra layer of protection.
The hope is when they pee it will only get on the saddle style pad cover which you can quickly rip off and replace without having to change the sheets.
I definitely recommend picking up two of those so you can swap out in the middle of the night.
If the urine makes it past the top bed pad it will get on the pad under the waterproof sheet and not hit your mattress pad. Who wants to change the sheets and mattress pad every night?
Ain’t nobody got time for that!
Step 4: Turn On The Light
This step is all about removing any obstacles and making it as convenient as possible for your little one.
I recommend keeping your child’s bedroom doors wide open and leaving the hallway light on. The reason I don’t recommend a hallway “nightlight” in the beginning is that little ones are often afraid of the dark and creepy shadows.
Heck, I’m afraid of those things and I’m in my 30’s!
So it’s better to keep the light on completely and then maybe an additional nightlight on in the bathroom. Also, let them know if they need to yell for you that they can.
I’d rather be woken up to help them to the restroom than be woken up to change the sheets. 🤷🏻♀️
Don’t worry, eventually, they don’t wake up to use the restroom in the middle of the night (or at least most kids don’t). This is just a temporary step for night-training.
Step 5: Never Skip Tracking!
Always make it a big deal when they earn a sun sticker and put their sticker on the chart every morning. It will become a game to them and they will try to get more and more Sun stickers.
Sometimes it’s hard to remember to put the sticker on their chart so if you forget fill it out ASAP. It’s best to do it right when they wake up every morning.
Don’t freak out if they wake up soaked or damp. Simply talk to them about it and encourage them to wake up dry so they can earn a sun sticker and ultimately a prize.
Waking Up To The Alarm
On the second night the alarm went off and we went running in there like chickens with our heads cut off.
Now let me tell you; Asher is basically a lump on a log, and waking him from dead-sleep is almost impossible. He was completely out of it even though the alarm was going insane. We finally got him out of the bed and to the bathroom.
This somehow never disturbed his 2-year-old brother who slept soundly through all of the chaos.
We ripped Asher’s clothes off and tried to get him to finish urinating in the toilet. Unfortunately, There was nothing left to pee by this point.
In the first week or so children usually let the floodgates completely open before waking up and realizing they need to hold it.
Step 6: You Must Act Fast!
This step is probably the most important rule to follow for successful night-training.
Asher wouldn’t wake up to his alarm and by the time I heard it go off and got into his room he’d already have the bed soaked. At this point, we were starting to get a bit frustrated.
This is when I went back to the reviews to see what I was doing wrong.
That’s when I read that you MUST get into their room immediately when it goes off. You cannot lolly-gag around on this.
For me, this presented a challenge as I’m a heavy sleeper myself and we are complete across the other side of the house. I also have to sleep with a fan blowing in my face at all times so it’s harder to hear the alarm.
But since I was more determined to train Asher than lose sleep over changing sheets every night, I pulled up my big-girl-panties and made away.
That “way” was my lovely husband sleeping on the couch since it was half-way between both of our bedrooms. 😂
When I would hear my husband getting up I would rush out of bed to help. Since we were getting Asher up faster he was beginning to hold some of the urine back while waiting for us. He was also beginning to wake up from the alarm.
If you need to sleep in the room with them or have them sleep with you – that’s honestly ideal. It’s much faster to get them up that way. (We had Abram sleep with us the second time around.)
It Will Wear You Out
Now I’m not gonna lie this was pretty tiresome on both my husband and me. Also, that alarm continues to beep for what feels like hours until you’re able to get it Unclipped from the soiled underwear.
It’s also surprisingly complicated to figure out how to unclip in the middle of the night while it’s beeping obnoxiously in your face.
There’s no other way to turn it off either until it’s separated from the soiled undies. Since everyone is in a state of shock from being brutally woken up, it makes the whole ordeal very uncomfortable and unenjoyable for all parties.
Pro tip: to make this experience even more miserable turn on all the lights in the bathroom.
Well, you’ll need to anyway to figure out how to un-secure and re-secure that stupid clip.
But that’s kind of the point, no one wants to hear that thing screaming at them in the middle of the night. Eventually, your child begins to dread this nightly ritual and it finally clicks for them to start holding it.
But like I said the key to making this work is;
A – being close enough to hear the alarm yourself,
B – Being fast enough to wake your child up until they can wake themselves up,
And finally C – Getting your child to the restroom as fast as possible to finish going in the toilet!
Something To Keep In Mind
At some point during training, you’ll want to encourage your child to run to the bathroom as soon as their alarm wakes them up.
One small issue we had with Asher was that he was beginning to be dependent on us to come to get him to take him to the bathroom.
So we started telling him to get to the bathroom and not wait for us.
That’s when we learned to start leaving the hallway light on for him and the door open.
He eventually started beating us to the bathroom which was amazing progress!
Step 7: Double The Reward With family Support
Get grandma, grandpa, aunt, uncle, bigfoot, or whoever to offer outside weekly encouragement. They can even add to the prize by throwing in an extra toy or cash for staying dry.
After we started implementing rule 6 (being quick) we noticed Asher beginning to have more dry nights.
Each week we would set a new goal asking him to earn more sun stickers so he could earn his weekend ice-cream date. He began to hit his weekly goals with little to no issues.
I noticed that his rainy stickers were becoming a thing of the past. He was starting to wake up faster and hold it. I was only having to change his underwear and not his PJs/sheets on his wet days.
Once Asher hit a couple of weeks of no bed wetting he got to pick out a cool toy along with his ice cream date. We also bragged to grandma and grandpa about his achievements.
Grandma and granny got Asher an additional special toy for becoming trained.
One day Asher finally asked if he could stop wearing the alarm and I told him he had to stay dry just a few more nights first – Which he did. We then took the alarm off officially and he never needed it again, praise the Lord!
After about a month or so of staying dry, we stopped using the saddle bed pads as well. We do keep the bed pad under the sheets just-in-case though.
Step 8: Don’t Freak Out Over Backtracking
Some children may relapse or backtrack after becoming night-trained. If they continue to wet the bed talk to them and start the training steps over again but without bribes.
Usually, the child may only have to wear the alarm a couple of times to get back on track.
Ashers only had two bedwetting accidents since – and it’s been almost a year. The second time he had a night accident I told him I’d put that alarm back on him and it must have scared him cause he hasn’t wet the bed again!
Was It Worth The Trouble?
Through this training-system, both of my boys were completely trained in 3.5 weeks.
It didn’t take them long, they both did really well. I was honestly shocked at how well this alarm worked and I wished I had heard of it much earlier.
You live and you learn I suppose.
If you enjoyed my review and if It helped save you from washing more sheets than necessary, could you please return the favor by sharing this post with another stressed-out mama who needs it?
Thanks, You’re The Best!

If you liked my post, here is an image you can pin or share!