10 Breastfeeding Products You Can Continue To Use After Nursing!

10 Breastfeeding Products You Can Continue To Use After Nursing!

If you’re about to begin your nursing journey and trying to get a good idea of what to buy, this is the post for you.

I’ve breastfed and pumped for all three of my children and have tried many different breastfeeding products.

Today, I’d like to share the nursing products that will stand the test of time and give you the most bang for your buck!

Affiliate Disclaimer:

This post contains affiliate links. This means that if you click on any of my fun-little-links and purchase something, I'll make a small commision at no extra cost to you. It's a win-win for both of us right?

1. Nursing Pads

So this one might sound a little strange, however, if you have several cotton or cotton/bamboo reusable nursing pads lying around you can still put them to good use!

The most popular way to repurpose nursing pads is to use them as makeup removers. They’re the perfect size for removing your eye or facial makeup after a long day.

If you do this you can also ditch the disposable facial wipes and help save the environment a little more. 

My Personal Favorite 
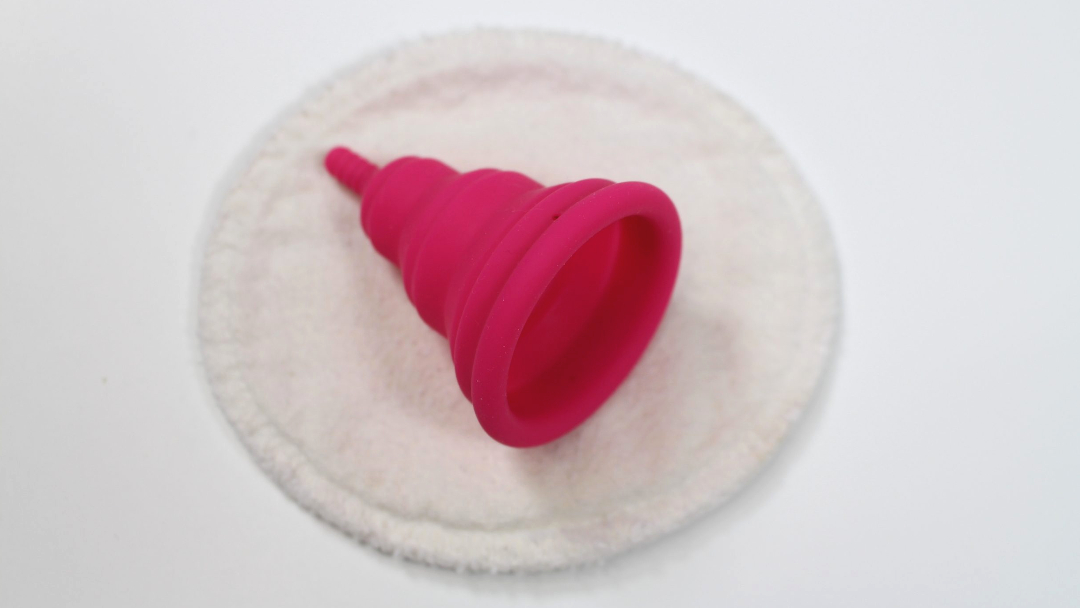
I’ve also stumbled on another unusual use for my old nursing pads. I like to use a breast pad as a clean barrier to sit my menstrual cup on after washing it.

Breast pads are the perfect size for this and they keep my cup from getting dirty as it dries.

I’ve also used my old nursing pads as makeshift coasters before, although, that was just a temporary thing. 

Menstrual Cup On Nursing Pad - 10 Breastfeeding Products You Can Continue To Use

2. Nursing Bras/Clothes

Who says you have to get rid of your maternity/nursing clothes after you’ve finished that stage of your life?

I still rock a few of my nursing bras today as one of them continues to provide great support while being super comfortable.

If you have cute nursing clothes such as hoodies, tanks, or dresses that don’t “look like” nursing clothes, you can continue to wear them. I won’t judge ya!

Some of my favorite nursing/maternity tops come from PinkBlush Maternity. You can check out the review I did for them if you’re interested.  

Nursing Tops

3. Nursing Cover Scarfs & LatchPal

Speaking of clothing, some nursing covers are designed to be multi-use and double as scarves or shawls.

I personally wasn’t a fan of nursing scarves as my nursing cover came with a stiff pointy neck that helped me to track baby’s latch.

However, If you already have one of those cute nursing scarves, you may as well get the most bang for your buck. 

Kids & Such (Amazon aff link) have some cool covers that double as burp cloths and there are some covers that double as car seat canopies as well. 

If you already have a LatchPal (Amazon aff link) you can also continue to use it to clip dresses and long shirts out of the way while your toddler is learning to potty!

LatchPal - Breastfeeding Products That You Can Continue To Use After Nursing

4. Bottle Brush

After you’ve finished with the baby bottle stage keep that bottle brush to wash out your water cups and canteens. I still use my brush when I need to get a really good scrub in the bottom of my blender or glasses.

My Favorite Bottle Brush (Amazon aff link) that I still use today comes with a stand and has a nipple cleaner. 

5. Baby/Cloth Wipes

I always kept cotton baby wipes by my nursing station or nursing bag to clean my chest or wipe down any milk drips on my bottles after pumping.

I’ve since repurposed all of my baby wipes into reusable napkins. We just keep a basket of clean wipes sitting on the table and my kids grab them as needed.

One of my very first posts was on Different Ways To Use Baby Washcloths if you want to check that out. 

You can also repurpose them into reusable tissues … or if you’re feeling super edgy you can use them as family cloth -aka- reusable toilet paper! 

They work nicely if you’re in a pinch. “Cough Cough, 2020!” 

6. Glass Bottles Or Breastfeeding Storage Bags

Glass is always a wonderful storage option for food as it’s non-toxic and can be used countless times.

I thoroughly loved using my Glass Baby Bottles (Amazon aff link) from Evenflow. I’ve always preferred storing and heating up my breastmilk or food in glass containers over plastic.

You can continue to use glass baby bottles to store maple syrups, spices, corn starch, or cleaning products such as baking soda. Your baby bottles can also be turned into emergency candles by adding soy wax and essential oils. 

Another idea is to use these bottles to store interior paint for occasional touch-ups. 

Don’t Forget About Those Breastmilk Storage Bags!
Do you still have a ton of milk storage bags left over? Don’t toss them Go ahead and store your homemade sauces, dressings, and purées in them.

Mince up some onion and garlic and even ginger in a ninja blender and divide up into your bags.

If you plan on making fried rice or any dish that calls for garlic and onions you can whip one of these bags out. It will cut down your prep time for sure. 

7. Boppy Pillow

The Boppy Pillow (Amazon aff link) is one of the best things ever invented for propping your baby up to nurse but did you know there’re many other ways to use this pillow?

A few common ways to use the boppy is to prop up your baby while bottle feeding or training them to sit up. You can also prop them forward on their tummies while they watch a cartoon.

But Wait, There’s More!
I saw a tip online that was pure genius and that was to use it to sit on after having a baby! This would allow you to not put pressure on your most sensitive bits but still sit comfortably. 

My young boys loved using their old boppy pillows wrapped behind them when watching TV. Boppy pillows add a little bit of back support even for older kids. You could also use your pillow to prop up a book or to play on your iPad for longer periods of time. 

If none of those ideas interest you how about gifting your Boppy to your pet to cuddle up with?

8. Nipple Cream Or Lanolin

Nipple Creams (Amazon aff link) are fantastic for keeping cracked and sore nipples at bay and they’re good for your skin in general.

Don’t toss your cream after you’re done breastfeeding. You can continue to use it as a gentle diaper cream or to soften the skin on your feet by wrapping it in a sock after applying.

I personally like to treat skin rashes with it since my kid’s struggle with eczema. 

Lanolin Is King
Did you know the best ingredient for chapped lips is pure lanolin and every major brand of chapstick has lanolin in it?

Skip all of the unnecessary fragrances and chemicals and rub Pure Lanolin (Amazon aff link) on your lips. This will keep them nice and healthy through the winter months. 

If you’re allergic to lanolin you can use raw organic coconut oil or Shea butter as a substitute.

h Mama® Organics

9. Wet Bags

When I was pregnant I purchased a small wet bag that was designed to carry my nursing gear around when I traveled.

Wet bags are great at preventing or limiting leaks if you need to store anything wet or something like milk storage bags that could leak. 

These bags are so versatile you can continue to use them to put dirty cloth diapers, makeup, toiletries, a wet bathing suit, extra change of clothes, or even snacks! 

Whatever you do, grab one of these suckers as they’re super useful. They come in many styles/sizes and I suggest getting one with an extra dry pocket like These Ones. (Amazon aff link)

Click the image above to play the video.

10. Designer Pumping Bags

Sarah Wells Bags (Amazon aff link) is basically the Michael Kors of pumping bags. If you plan on pumping at work and want to carry your pumping supplies, these bags are a great option. 

Sarah Wells bags don’t look like “pumping bags” as they are fashionable and even convert over into diaper bags. You can continue to use them as regular day bags once your nursing and baby journey is over. 

Well that’s it for the breastfeeding products that you can continue to use or repurpose. Let me know in the comments below what your favorite repurposing hack was or do you have another usefull tip to share?

Giveaway Image, Breastfeeding Products

Giveaway Details!

US & Canada Only!

If you’d like to enter this awesome giveaway simply comment below your favorite breastfeeding product repurposing hack from above or share one that wasn’t listed.

Also, if you share this post on social media, let me know and I’ll add your name twice into the drawing!

I’ll respond to the winners comment on this page and also send an email. Winner has 48 hours to respond before a new winner will be chosen.

Sponsor, Prize, & Discount Info!

Kids & Such

Kids & Such is giving away one nursing cover, one multi-use cover, and one boppy pillow cover. The winner will get to choose their pattern of choice from the options given! 🙂

Kids & Such is offering a 15% off code for my nesties (you guys) on thier website and 10% on thier Amazon store. Use code greennest15


Kids N’ Such is a brand whose soul purpose extends far beyond providing high quality products for children. We wanted our products to be intuitive for parents as well. We wanted them to be so useful that every parent would want them, not just for their kids, but also for themselves. 

We take great care in selecting products that add value to the lives of our customers. This is possible because we are parents too. We know that safety is of the utmost importance and that quality is essential.

LatchPal

Gray Arrow LatchPal - Breastfeeding Products

LatchPal is giving away their gray arrow LatchPal along with a set of breast soothies.

Use code LPGIFT20 to grab 20% off on the LatchPal website until the new year, 2022!


Melissa LaHann is the creator of LatchPal and the founder of Happy Fig. Her business is 100% woman-owned and her products are made in Chicago, Illinois.

When Melissa was learning to breastfeed, she struggled to nurse in comfort as she held her infant and her shirt (up and out of the way).  She’d been cinching her shirt beneath her chin and she knew there had to be another way; that’s when the idea of LatchPal was born. LatchPal holds up a mother’s shirt to eliminate muscle tension while nursing, so mom can relax and optimize milk flow for breastfeeding success. The simple design and one-handed fastening have made it a top choice for moms, hospitals, and lactation professionals!

You can purchase LatchPal on Amazon, ETSY, or LatchPal.com, and don’t forget to show Melissa some love on social @LatchPal.

Bamboobies

Bamboobies is giving away $25.00 in store credit to their store. The winner can purchase anything they need.


Bamboobies puts moms first. Created by a real-life mom who was frustrated at the lack of reusable and comfortable nursing pads, Bamboobies combines smart design and baby-and-mom-friendly ingredients to provide worry-free, effective products that support and empower every mom at every stage of her motherhood journey.

Enter The Giveaway!

Day(s)

:

Hour(s)

:

Minute(s)

:

Second(s)

10 Breastfeeding Products You Can Keep Using After Nursing

If you liked my post, here is an image you can pin or share!

Hospital Bag Checklist

Get your full guide on what to pack, just click the image above!

8 Steps For Night Night-Training A Stubborn Child!

8 Steps For Night Night-Training A Stubborn Child!

Do you have a stubborn bedwetting toddler that refuses to night-train no matter what you do?

Maybe they’re not so little, possibly age 7 and up? Does your child exhibit anxiety or embarrassment over their bladder?

Do you spend a fortune on pull-ups and constantly wash sheets or bed pads?

Well, not so long ago I was also a slave to constant sheet washing. Thankfully I found a tool that 100% cured my son’s bedwetting woes in precisely 3.5 weeks!

Yes, you read that right, 3.5 weeks.

If you’re sick of changing/washing sheets and ready to save your sanity keep reading. I’m going to show you my 8 foolproof tips for successful night-training!

Affiliate Disclaimer:

This post contains affiliate links. This means that if you click on any of my fun-little-links and purchase something, I'll make a small commision at no extra cost to you. It's a win-win for both of us right?

What You’ll Need

So let’s cut right to the chase; The one thing you MUST-HAVE for night-training a stubborn child is this Bedwetting Alarm (Amazon aff link). This product is worth its weight in gold. This alarm also comes with a progress tracking sheet with some stickers.

BTW: I’m not sponsored by this company, but I’ve had two kids successfully night train within 3-4 weeks of using their alarm. 

I can’t help but sing its praises to all who will listen. 

You’re also going to benefit from grabbing some Waterproof Bed Pads (Amazon Aff Link) but more on that later. 

Now please continue to read because there’re a few key rules you need to follow in order to succeed. I’m going to be going over all of the steps along with the mistakes I made when night training my first time.

In this post, I’m going to tell you how we successfully potty-trained our first child (who constantly wet the bed) and the exact steps we took to make this program 100% successful.

If you’re child struggles with sensory issues, or has special needs you may want to consult with their pediatrician before starting this program. 

Since I love my nesties, I’ve put together a special set of FREE downloads to help you in your night-training endeavors!

I’ve included a fun progress tracking sheet that you can use to help motivate your child, my quick 8-step night-training hacks, and two big-kid underwear themed coloring sheets/cutouts! 

The Story Of My First Little Bedwetter

My first child Asher was such a deep sleeper that nothing I ever did to night-train worked on him.

I kept thinking he’d eventually stop wetting the bed on his own. All of my friend’s kids were sleeping in regular underwear and had little to no issues.

Asher used the potty during the day just fine he actually potty-trained within a week at two in a half. (Guide to potty-training coming soon) However, night-time was a completely different story.

We tried all the things
We did all of the typical tips you read online and I took advice from other moms in various mommy-themed Facebook groups.

Drinks were no longer given past 6 pm and surprise, surprise, he’d still wet the bed. It’s almost as if his body produced more water to make up for what we didn’t give him. 😒

This also started causing issues because he would get genuinely thirsty some nights after playing. We eventually let him have a few sips of water before bed.

He Could Not Be Bribed
We tried bribing him and offering toys and cash if he’d wake up dry. That never worked either, in fact, one time Asher responded with “I have enough money and toys!” Then he continued to nonchalantly play video games while I tried not to laugh and cry.

We also tried waking him up at 10 pm or before we went to bed. This was very disruptive and a pain in the butt to get him to wake up.

Even after all of this, he’d somehow magically summon enough water to soak the bed!

The White Flag

Eventually, After washing tons of sheets we gave in and put him in overnight pull-ups.

Now I tried using the reusable ones from GroVia (aff link) but he outgrew them and would soak-through even with extra absorbent inserts.

I believe at one point I brought up my concern to his pediatrician and was told the basic tips and that some kids are just heavier sleepers than others.

Things Had To Change
One day I was browsing for new pull-ups online as Ashers were getting too snug on him. And I couldn’t find any pull-ups that went from 5t and up. Everything was 2t to 3T, 3t to 4t, and 4t to 5t.

I kept searching and searching then I saw the next sizes up were geared towards kids with incontinence issues or special needs.

Asher was 5 years old at this point and I realized I had to get him out of pull-ups as he wasn’t going to learn on his own. He was starting to soak his sheets every single night. Even in his pull-ups and showed 0 signs of slowing down.

With three kids this was just beginning to be a massive headache. I also hated him wearing disposables so I went to the trusted inter-webs aka Google And looked for alternative solutions.

The Answer was Right in front of me
I then discovered the holy grail of night training; the bedwetting alarm system on amazon. I read review after review and everyone swore by this thing.

I read about one kid who was older and even embarrassed to sleep over at other kid’s houses because he kept wetting the bed. They used this alarm system and within a few weeks, he was sleeping through the night.  

At this point, desperation had settled in. I was willing to buy anything that offered a glimmer of hope.

Click the image above to play the video.

How The Bedwetting Alarm Works

So basically this device straps onto the child’s arm with velcro and has a wire that protrudes down with a sensor at the end. The end of the wire with the sensor clips directly to the front of the underwear.

After everything is in place you can put their PJs back on. I recommend long sleeves to help keep the sensor in place on their arm.

Once the sensor gets wet it sounds the alarm which is super loud and obnoxious. It then sends a horrifying shock to your child that bolts them out of the bed.

Just kidding guys, just making sure you’re paying attention! 😅

The alarm does however vibrate and has different alarm settings In case your kid gets used to the sound of one of the alarms.

The set I received came with a little tracking chart and stickers for keeping score of your child’s progress.

The first night after we strapped it on Asher actually stayed dry. I think it’s because he was so focused on it he didn’t pee. We proudly put the sun sticker on his chart that next morning.

Sun stickers are for dry days, partially sunny stickers are for slight accidents and rainy stickers are for full-on bed-soaking accidents.

Like I mentioned earlier, I’ve also created my own progress chart that you can download and print for free. 

SIGN UP HERE TO GRAB YOURS

Possible Reasons Your Child Hasn’t Trained

Some children’s brains never send the signal to the body to wake up when they urinate.

So the idea behind the bedwetting alarm is to help the child link the sound of the alarm with the internal signal in the body.

Eventually, they need less and less alarm as their brain begins to send a stronger signal and they begin to wake up.

This is the reason I suspect Asher never woke up at night even if he soaked the bed. 

Another possibility could be that your child is comfortable wearing pull-ups so they don’t try to go to the potty. I feel like my second child Abram fell more into this category. 

The Proper Night-Training Steps  

Now I believe this is supposed to be a 6-12 week program but your child could train earlier than that. It all depends on the child and how dedicated you are to following the right steps. 

You also have to work with your child correctly or this thing will NOT work.

As a matter of fact, I started to think it didn’t work after two weeks. I went back and read the reviews on the alarm and realized I was doing some things wrong which were hindering Asher’s progress.

After I fixed those issues (which we will discuss in a moment) Asher began improving almost instantly until he no longer needed the alarm.

As you can see below, Asher trained in about 3.5 weeks which wasn’t bad at all. At the 6 week mark, I stopped keeping track. Some days were not tracked because he was pretty sick. So we waited for him to feel better before continuing the program.

Abram’s progress was charted on the right side later on. Both of my kids trained in about the time time-frame. 

Asher & Abram's Bedwetting Progress Chart

Step 1: Explain The Process
On the first night of training, we explained to Asher exactly what was going to go down and how he’d no longer be wearing pull-ups. He was reminded that he now needed to use the potty and not go in his pants.

We showed him the alarm and how it worked. I licked my finger and touched the sensor to show him how loud it was. We also showed him the sticker chart and how he could earn prizes by earning Sun stickers.

Your child may not completely understand what’s about to happen, but let them know anyway.

Step 2: Set Up A Rewards System
If Asher was able to get two Sun stickers by staying dry at least two nights in that first week, we’d take him out to get ice cream.

If he earned more Sun stickers than required, we’d let him pick out a small prize on the following weekend as well.

With my second child, Abram, we’d reward him and the family with ice cream at Freddie’s every weekend as long as he earned the appropriate amount of Sun stickers through the week.

Each new week I asked him to stay dry more days in order to earn a trip to Freddies. In the end, when Abram continued to stay dry for over two weeks straight, he earned a New Scooter! (Amazon aff link)

Abram On His New Scooter After Night Training

Feel free to play around with the bribes and change up the rewards system. You could do ice cream one week, a small reward each day if they woke up dry, or one huge prize if they graduate the program.

The sky is the limit, just do what works for your child.

Step 3: Prepare The Area
Before you get ready to train your child make sure you get these Saddle Style Bed Pads (Amazon Aff Link) that go over the top of your sheets. Also, have an extra Waterproof Bed Pad (Amazon Aff Link) under your fitted sheet as an extra layer of protection.

The hope is when they pee it will only get on the saddle style pad cover which you can quickly rip off and replace without having to change the sheets.

I definitely recommend picking up two of those so you can swap out in the middle of the night.

If the urine makes it past the top bed pad it will get on the pad under the waterproof sheet and not hit your mattress pad. Who wants to change the sheets and mattress pad every night?

Ain’t nobody got time for that!

Step 4: Turn On The Light
This step is all about removing any obstacles and making it as convenient as possible for your little one.

I recommend keeping your child’s bedroom doors wide open and leaving the hallway light on. The reason I don’t recommend a hallway “nightlight” in the beginning is that little ones are often afraid of the dark and creepy shadows.

Heck, I’m afraid of those things and I’m in my 30’s!

So it’s better to keep the light on completely and then maybe an additional nightlight on in the bathroom. Also, let them know if they need to yell for you that they can. 

I’d rather be woken up to help them to the restroom than be woken up to change the sheets. 🤷🏻‍♀️

Don’t worry, eventually, they don’t wake up to use the restroom in the middle of the night (or at least most kids don’t). This is just a temporary step for night-training. 

Step 5: Never Skip Tracking!
Always make it a big deal when they earn a sun sticker and put their sticker on the chart every morning. It will become a game to them and they will try to get more and more Sun stickers. 

Sometimes it’s hard to remember to put the sticker on their chart so if you forget fill it out ASAP. It’s best to do it right when they wake up every morning. 

Don’t freak out if they wake up soaked or damp. Simply talk to them about it and encourage them to wake up dry so they can earn a sun sticker and ultimately a prize.

Waking Up To The Alarm

On the second night the alarm went off and we went running in there like chickens with our heads cut off.

Now let me tell you; Asher is basically a lump on a log, and waking him from dead-sleep is almost impossible. He was completely out of it even though the alarm was going insane. We finally got him out of the bed and to the bathroom.

This somehow never disturbed his 2-year-old brother who slept soundly through all of the chaos.

We ripped Asher’s clothes off and tried to get him to finish urinating in the toilet. Unfortunately, There was nothing left to pee by this point.

In the first week or so children usually let the floodgates completely open before waking up and realizing they need to hold it.

Step 6: You Must Act Fast!
This step is probably the most important rule to follow for successful night-training.

Asher wouldn’t wake up to his alarm and by the time I heard it go off and got into his room he’d already have the bed soaked. At this point, we were starting to get a bit frustrated.

This is when I went back to the reviews to see what I was doing wrong.

That’s when I read that you MUST get into their room immediately when it goes off. You cannot lolly-gag around on this.

For me, this presented a challenge as I’m a heavy sleeper myself and we are complete across the other side of the house. I also have to sleep with a fan blowing in my face at all times so it’s harder to hear the alarm.

But since I was more determined to train Asher than lose sleep over changing sheets every night, I pulled up my big-girl-panties and made away.

That “way” was my lovely husband sleeping on the couch since it was half-way between both of our bedrooms. 😂

When I would hear my husband getting up I would rush out of bed to help. Since we were getting Asher up faster he was beginning to hold some of the urine back while waiting for us. He was also beginning to wake up from the alarm.

If you need to sleep in the room with them or have them sleep with you – that’s honestly ideal. It’s much faster to get them up that way. (We had Abram sleep with us the second time around.)

It Will Wear You Out

Now I’m not gonna lie this was pretty tiresome on both my husband and me. Also, that alarm continues to beep for what feels like hours until you’re able to get it Unclipped from the soiled underwear.

It’s also surprisingly complicated to figure out how to unclip in the middle of the night while it’s beeping obnoxiously in your face.

There’s no other way to turn it off either until it’s separated from the soiled undies. Since everyone is in a state of shock from being brutally woken up, it makes the whole ordeal very uncomfortable and unenjoyable for all parties.

Pro tip: to make this experience even more miserable turn on all the lights in the bathroom.

Well, you’ll need to anyway to figure out how to un-secure and re-secure that stupid clip.

But that’s kind of the point, no one wants to hear that thing screaming at them in the middle of the night. Eventually, your child begins to dread this nightly ritual and it finally clicks for them to start holding it.

But like I said the key to making this work is; 
A – being close enough to hear the alarm yourself,
B – Being fast enough to wake your child up until they can wake themselves up,
And finally C – Getting your child to the restroom as fast as possible to finish going in the toilet!

Something To Keep In Mind

At some point during training, you’ll want to encourage your child to run to the bathroom as soon as their alarm wakes them up.

One small issue we had with Asher was that he was beginning to be dependent on us to come to get him to take him to the bathroom.

So we started telling him to get to the bathroom and not wait for us.

That’s when we learned to start leaving the hallway light on for him and the door open.

He eventually started beating us to the bathroom which was amazing progress!

Step 7: Double The Reward With family Support
Get grandma, grandpa, aunt, uncle, bigfoot, or whoever to offer outside weekly encouragement. They can even add to the prize by throwing in an extra toy or cash for staying dry.

After we started implementing rule 6 (being quick) we noticed Asher beginning to have more dry nights.

Each week we would set a new goal asking him to earn more sun stickers so he could earn his weekend ice-cream date. He began to hit his weekly goals with little to no issues.

I noticed that his rainy stickers were becoming a thing of the past. He was starting to wake up faster and hold it. I was only having to change his underwear and not his PJs/sheets on his wet days.

Once Asher hit a couple of weeks of no bed wetting he got to pick out a cool toy along with his ice cream date. We also bragged to grandma and grandpa about his achievements.

Grandma and granny got Asher an additional special toy for becoming trained.

One day Asher finally asked if he could stop wearing the alarm and I told him he had to stay dry just a few more nights first – Which he did. We then took the alarm off officially and he never needed it again, praise the Lord!

After about a month or so of staying dry, we stopped using the saddle bed pads as well. We do keep the bed pad under the sheets just-in-case though.

Step 8: Don’t Freak Out Over Backtracking
Some children may relapse or backtrack after becoming night-trained. If they continue to wet the bed talk to them and start the training steps over again but without bribes.

Usually, the child may only have to wear the alarm a couple of times to get back on track.

Ashers only had two bedwetting accidents since – and it’s been almost a year. The second time he had a night accident I told him I’d put that alarm back on him and it must have scared him cause he hasn’t wet the bed again!

Was It Worth The Trouble?

Through this training-system, both of my boys were completely trained in 3.5 weeks. 

It didn’t take them long, they both did really well. I was honestly shocked at how well this alarm worked and I wished I had heard of it much earlier.

You live and you learn I suppose.

If you enjoyed my review and if It helped save you from washing more sheets than necessary, could you please return the favor by sharing this post with another stressed-out mama who needs it?

Thanks, You’re The Best!

Night-Training 8 Steps Pinterest Cover Image

If you liked my post, here is an image you can pin or share!

Carnival Themed Birthday Party
If you’d like to get my FREE Printables, click the image above!

Why You Should Use Reusable Swim Diapers Even If You Don’t Cloth Diaper!

Why You Should Use Reusable Swim Diapers Even If You Don’t Cloth Diaper!

It’s warming up around here and my local pool finally opened up this weekend! Time to bust out the reusable swim diapers and floaties. If your tired of being cooped up with the kids, taking them swimming or doing some outdoor water-play is a must.

If you’ve never cloth diapered before you might be wondering if you should invest in reusable or disposable swim diapers. I’ve actually put the two types of diapers to the test to see which one performs better. The results were very interesting!

Maybe you’ve already jumped onto the cloth diapering bandwagon and are now considering cloth swim diapers. Luckily for your britches, I have some great information on that as well. Continue reading if you want to see my full swim diaper guide and enter the giveaway! 

Affiliate Disclaimer:

This post contains affiliate links. This means that if you click on any of my fun-little-links and purchase something, I'll make a small commision at no extra cost to you. It's a win-win for both of us right?

What Are Reusable Swim Diapers?

Reusable swim diapers are lightweight-tighter fitting diapers that can be used again and again for swimming or water-play. They’re usually made without any extra padding and work to contain poopy accidents that may occur in the pool.

Some Swim Diapers (aff link) will have a little padding that’ll help with light leaks when getting to the pool. They won’t contain full-on accidents though unless it’s poo.

Just like disposable swim diapers, reusable swim diapers DO NOT contain urine!

I actually did a test to prove this which you can watch in the video below. 

Click the image above to play the video.

No Sagging!

One of my favorite things about reusable swim diapers are that they don’t sag or weigh the baby down in the water. They fit nice and trim allowing baby to move freely in the water. 

Disposables will expand and cause an ugly and uncomfortable droop on a baby’s bum.

All of that sagging in disposables is pointless because these diapers don’t contain urine anyway! 

Reusable Swim Diapers From Walmart

Types Of Reusable Swim Diapers

Just like regular cloth diapers, swim diapers come in an array of styles and prints. However, they come in fewer varieties of materials compared to regular cloth diapers.

Most reusable swim diapers are made with a cotton, mesh lining – or both, strong elastics, and a PUL or TPU outer material. Swim diaper inner fabrics can be made up of nylon, polyester, cotton, or a combination.

Certain swim diapers can simply be Pulled-up, some have Side-Snaps, (Aff links) some feature a drawstring, and a few are secured with velcro.

Other reusable swim diapers can come in different sizes or they might feature a snap-rise like this one from Thirsties that I love! (Amazon aff link) In other words, the snap-rise diapers are adjustable to fit different size ranges. 

Pulling Up Can Be A Drag
The pull-up type is fairly simple to use. However, when wet, pulling up or down can be a bit more challenging. If crap hits the fan…or your swim diaper…. these are a little more difficult to clean.

I prefer the ones that feature snaps on the sides. They can be laid flat if you need to quickly spray a mess off with a diaper sprayer.

I’ll talk more about how to clean your reusable swim diapers in a moment.

Click the image above to play the video.

Click the image above to play the video.

Reusable vs Disposable Swim Diapers


How To Properly Use/Fit Swim Diapers

Swim Diaper Sizes
Most reusable swim diapers are Sized meaning you’ll need to buy a new one every time your baby hits a new weight bracket.

Usually, you can get away with wearing the same one all Summer unless your child hits a crazy growth spurt.

The benefit of using sized swim diapers is that you’ll usually get a tighter and more proper fit.

Some reusable swim diapers are one-sized (OS) meaning they have an adjustable snap-rise in the front. As your baby grows you can snap it on the next setting. OS swim diapers allow you to fit your baby or toddler for a longer time-range.

Age Ranges
Most reusable swim diapers can be worn by babies around 11 pounds or 6-month to toddler size.

Some size ranges are measured by age, some are by weight, and I’ve also seen some by waist and thigh measurements.

Properly Fitting Swim Diapers
When choosing your swim diaper make sure you get the correct size range for your child. If your diaper is a OS make sure it’s on the correct snap-rise setting for your child’s weight.

You want it to fit somewhat tight and slim on your child. Any gaps or poofiness isn’t good and will slow your child down in the pool. The diaper needs to fit similar to a bathing suit.

Make sure the waist and the legs are snug but not leaving red marks. They need to be tight enough to hold-in any “accidents” that might occur.

If you rarely go swimming you may still want to bring an extra swim diaper in case the child has an accident right away.

Beach Ball - Reusable Swim Diapers

Are Reusable Swim Diapers Allowed In Public Pools?

This is something you’ll want to check with your local pool beforehand. Each place has its own set of rules and regulations.

A lot of public pools prefer the reusable swim diaper or only allow them on small children/babies. Some will only allow disposables and I’ve even heard of pools requiring both a disposable and reusable!

Some pools won’t care what kind of diaper you use as long as you put rubber pants over the child’s diaper.

These things are a bit old-school and can be hard to find. However, you can click my beautiful (Amazon Aff Link) Here and make me super-rich. 😉

Abram In A Charlie Banana Reusable Swim Diaper

Regular Cloth Diapers Or Reusable Swim Diapers?

After asking around in a few cloth diapering groups I found that several moms prefer to use regular cloth diaper covers or shells over purchasing extra swim diapers.

Personally, I’ve used both and can tell you that using cloth diapers over swim diapers can be good in some cases and bad in others.

They’re Made Differently
Regular cloth diapers are not made with the intention of being submerged in water. In some cases, the lining could be more irritating to your child’s skin after swimming.

The elastics may not hold up as well in your regular cloth diapers and contain an accident.

One of the main reasons you’d want to opt tor an actual reusable swim diaper is because chlorine can deteriorate the PUL and elastic or fade your cloth diapers.

If you take your baby swimming often it’s better to go with a reusable swim diaper as they’re made with the purpose of containing poo within a pool and to tolerate harsher Chlorine water.

They’re Poop Catching Machines
The inner lining of a swim diaper is usually mesh or a soft cotton material. Sometimes it has an extra layer of mesh to help trap the ????. There isn’t any bulk and the elastics are made to fit more snuggly to hold in any accidents that could happen in the water.

Benefits Of Using Regular Cloth Diapers As Swim Diapers
If you’re on a tight budget it may be more cost-effective to use a couple of your older cloth diaper shells, covers, or pockets (no inserts).

You just need to keep in mind that the chlorine can deteriorate and fade them overtime.

So go ahead and reach for that ugly neglected diaper collecting dust your stash guilt-free!

If you’re not one to go to the pool but you like to play water games (no chlorine) in the backyard then using a good fitting cloth diaper shell is perfectly fine.

I personally prefer to use my swim diapers as they normally cost less to replace than my regular cloth diapers.

Best Types Of Cloth Diapers For Swim Diapers
Empty pocket shells. Don’t keep the insert or it will weigh your baby down. I’ve also tested out Diaper shells such as GroVia, and Buttons and they work pretty well.

*My Buttons Diaper Cover (Amazon Aff Link) once contained an explosive abomination when Asher was playing in one of those mini backyard pools.

Dealing With Poop & Washing Your Swim Diapers!

If you’ve never had experience with reusable cloth diapers before you may be wondering how to use reusable swim diapers at the pool.

Don’t worry, I got your baby’s back.. or bottom…

You can totally get away with having one reusable swim diaper per child but as I said, if your baby decides to drop a nugget 5 minutes into swimming… you’ll have to go home.

Pro Parenting Tip – You Can Never Be Too Prepared!

This is why I suggest having an extra swim diaper on hand even if you rarely take your kids swimming. They’re very affordable so it’s always good to have a backup plan.

What To Do If Your Baby Drops It Like It’s Hot!
If you find yourself in a “crappy” situation don’t panic. Swim diapers aren’t that hard to clean. Try to flop-and-drop most of it in the toilet if you can before storing it in your wet bag. It’ll be easier if you can unsnap the sides.

Once you get home you can quickly spray the swim diaper off with a water-hose or a Diaper Sprayer If it’s needed.

I personally love my Diaper Dawgs Sprayer. (aff link) However, most of the time you can simply dump in the washing machine, along with your wet bag and let it do the work for you.

If there’s any fecal matter on your swim diapers then I would do a pre-rinse and wash on hot. I recommend hang-drying your swim diapers and wet bags so they’ll last longer. Never add any fabric softeners to your diaper laundry!

If your swim diapers provide any washing instructions, be sure to follow them. You don’t want to end up voiding any warranties by accident.

Personally, I’ve always thrown my swim diapers in with the cloth diaper laundry and hang-dried. We don’t go swimming a lot but my Charlie banana Swim Diapers (aff link) still look new after a couple of years of use.

Swim Diaper Accessories

One thing I would highly suggest purchasing (whether you cloth or not) is a wet-bag. A wet bag is a reusable waterproof or water-resistant bag that can be used multiple times.

They cost very little and are great for storing soiled diapers until you can get home to clean them.

I recommend grabbing one with a wet and dry pocket. you can put your soiled or simply used swim diaper in one pocket and your extra diaper or swimming accessories in the dry pocket.

Another option is you having one wet bag for soiled or wet pool stuff and one for accessories like sunscreen, glasses, extra swim diaper, etc. If your sunscreen leaks, it will stay within the wet bag!

You can also use a Diaper Pail Liner (which is basically an oversized wet bag) to store your damp towels and bathing suits. This will keep your Car seats from getting soiled.

When you get home you simply dump the entire thing in the wash until next swimming adventure.

You can purchase wet bags in all different styles, sizes, colors and price ranges.

Here Are A Few Wet Bags I Highly Recommend:

❤️GroVia Wet Bags (Aff Link) I’m a total fan-girl for all things GroVia. They make a lot of products that have held up for years of use and abuse! In my link, you will find several types of wet bags to choose from.

❤️Alva Wet Bags (Amazon Aff Link) I’ve been using a few of these since I started cloth diapering almost 4 years ago. These are super affordable and have held up over time. They also feature a dry pocket!

The downside is they’re a little smaller (which is fine for a pool trip) and they’re made overseas and not locally. They’re also not as thick as my Spray-Pal bag and can seep out more moisture.

❤️GroVia Diaper Pail Liners (Aff Link) – I love my GroVia diaper pail liner and have reviewed it in the past. You can check out that review Here if you’re interested. This is a great-quality pail liner that you can use to store dirty cloth diapers or wet towels when going to the pool or the beach!

How Long Do Swim Diapers Last?

My Charlie Banana swim diapers received low to medium use and are still in top shape after two kids!

If you rarely use your swim diapers they can last several years and be used on multiple children. If you like to take pool trips you can probably use for a couple of seasons.

With heavier use they will probably last for one season. The way you wash and care for your swim diapers will also effect the longevity along with the quality of the diaper. If your big on outdoor water-play and the diaper doesn’t come in as much contact with chlorine they’ll also last a bit longer.

Getting Swim Diapers Cheap!

Most reusable swim diapers are fairly priced to begin with but you can easily find even better deals if you know where to look!

The best way is to stock up on a few sizes at the end of the season. I’ve seen (Amazon Aff Link) IPlay Swim Diapers marked down at Target and an entire tub of swim diapers marked down to a couple of dollars apiece at Walmart.

I grabbed up a few of those bad boys for Abram!

Pro Tip: Check for deals in the off-season on cloth diaper sites like KellysCloset.com or JilliansDrawers.com.

Buying Used
Don’t be afraid to buy used because a lot of swim diapers aren’t used regularly and tend to stay in great condition.

Do a quick Facebook group search for “Cloth Diapers Buy Sell Trade” and you will see several groups where you can find swim diapers and more. This Cloth Diaper B/S/T Group is based in the US if you want to check it out. Also, be sure to look at Facebook marketplace or Craigslist.

*DiaperSwappers.com is another great website where you can find used cloth but you do have to join or sign-up to view anything. 

Be careful and follow any safety precautions when meeting up with strangers that you want to buy from.

I hope you enjoyed this post detailing swim diapers and how to use them. I put a lot of work into it so please drop me a comment below if you have any questions! 

Charlie Banana Reusable Swim Diaper Giveaway
How To Enter The Giveaway!

US BASED ONLY!

To Enter the giveaway simply leave a comment below on this blog with something to do with reusable swim diapers. Then share my blog on Pinterest using the image below and let me know your Pinterest name in the comments. If you don’t have a Pinterest share on Fb and let me know.

I’ll be choosing a winner on Saturday, April 10th!  

Thank You, Guys! 

Giveaway Has Ended, Sorry!

Day(s)

:

Hour(s)

:

Minute(s)

:

Second(s)

Reusable Swim Diapers - Pin Image

If you liked my post, here is an image you can pin or share!

Charlie Banana Swim Diaper Review

If you’d like to learn about the Spray Pal Sprayer Shield, click the image above!

10 Natural Postpartum Care Products That Help You Heal Faster!

10 Natural Postpartum Care Products That Help You Heal Faster!

After having three beautiful children and recovering from birth three times I learned a thing or two about natural postpartum care.

The first time I became a mom I wasn’t into cloth diapering or anything like that. My first postpartum experience was very painful. Once I had my second child Abram I was 100% into cloth diapering and doing things more naturally. 

After I made the change I feel like I had a much faster recovery so I wanted to share some things that worked for me! 

Affiliate Disclaimer:

This post contains affiliate links. This means that if you click on any of my fun-little-links and purchase something, I'll make a small commision at no extra cost to you. It's a win-win for both of us right?

Click the image above to play the video.

1. Reusable Waterproof Bed Pads

Ok, I know this one doesn’t help “heal you” but please hear me out!

No one seems to talk about all of the gnarly bodily fluids you’ll be dealing with after popping out a kid. And even if you have a cesarean doesn’t mean you won’t bleed either!

You may even experience several weeks or night-sweats where you’ll literally soak the sheets. Breastmilk will be leaking all over the place even with your best attempts at using nursing pads.

Usually, more during the beginning as your body is adjusting to the right amount of milk production.

Also if you’re night nursing in the bed or simply playing with your baby they tend to have diaper leaks, blowouts, and spit-ups.

Doesn’t this all sound incredibly pleasant?

This is why reusable washable bed pads are seriously underrated and one of the most useful tools to have during your postpartum period. They give another layer of protection to your mattress, the mattress cover, and your sheets.

It’s well worth the investment ladies!

There Are two types of bed pads that I recommend.

The first ones are these simple (Amazon aff link) Rectangle Bed Pads. You simply put them over your mattress protector and slip your fitted sheet over the pad.

This will save you from having to wash your mattress protector or worse, soaking through to your mattress!

The second type is one that goes over the top of your flat sheet. To secure it in place you’d simply tuck the sides under the edges of the bed.

(Amazon aff link) Saddle Style Bed Pads.

This type of pad keeps you from having to strip the sheets and wash them. It’s so much easier to change/wash the top pad than stripping sheets, washing, and putting your sheets back onto the bed.

Get the two-pack so you can rotate. These will save your sanity I promise!

But Wait … There’s More!

Now the best thing about these reusable bed pads is you can continue to use them for your kids. Mine tend to have a lot of bedwetting accidents, so these are great!

Abram In Bed - Natural Postpartum Care Products

Nipple Care

2. Bamboobies Nipple Balm
The first time I became a mom to say that breastfeeding was painful was an understatement. Although, It got easier after I learned a few tricks and the pain eventually faded away.

This Nipple Balm (Amazon aff link) kept me from having cracked and bleeding nipples. I also lubed my pump shields with this stuff to make for a smoother pumping experience.

Bamboobies is 100% natural, USDA certified, made in America, and 100% safe for your baby to ingest.

You can also repurpose it as a cloth safe diaper cream when you’re done.

Bamboobies Nipple Balm - Natural Postpartum Care Products

Another alternative to Bamboobies is Organic Virgin Coconut Oil. (Amazon aff link) It’s very versatile and cheap. You can use it as a moisturizer, for stretch marks, as a diaper cream, baby lotion, and on and on.

Other reviewers swear by the balms made from Earth Mama Organics (aff link) Organic Nipple Butter.


The last thing I want to quickly mention since we’re on the subject – is an organic belly oil that soothes the skin during pregnancy and helps with stretch marks.

(Amazon aff link) Green & Lovely Belly Oil is actually from an Etsy seller whom I’ve worked with before. I reviewed her cloth diaper wipe spray. She makes a lot of useful organic solves.

Her oil helped keep my big belly from feeling so itchy and tight. It also had the most INCREDIBLE smell!

I used every. last. drop.

Don’t Weld It, Shield It!

3. Silicone Nipple Shield
When I was breastfeeding at the beginning with each child (and at random other times) my nipples would get really sore. This is when I’d slip on my Medela Nipple Shield (Amazon aff link).

This gave me a little protection against my little toothless piranhas.

I’ve linked you to a shield that comes in a pack of two with a case. Sometimes the hospital will give you a free one but it doesn’t hurt to have a spare.

These are a MUST-HAVE if you have inverted nipples and the baby has a hard time latching.

Postpartum Recovery Belt - Natural Postpartum Care Products

4. Postpartum Recovery Belt
Postpartum recovery belts are meant to help provide support after having a child. They hold everything in and supposedly help your tummy to shrink back up if worn enough. You’re supposed to wear them for several hours a day for a few weeks.

I had two different types of these, one I received for free from the hospital.

If we’re being honest…
Honestly, I wasn’t too great at being consistent with them. I found the belts to be a bit uncomfortable. I thought I’d mention them anyway because my friends SWORE by them! They credited the belts for their belly’s shrinking back up.

Be sure to follow your Drs. advise if you’ve had or plan on having a cesarean.

You don’t want to negatively impact your healing. I’ll link you to the one I have on Amazon here. (Amazon aff link) Don’t forget that the hospital may also provide you one if you simply ask.

Down Stairs Care

5. Postpartum Cloth Pads
I used the regular ol’ hospital pads after my first kid before I knew cloth pads existed. When Abram and Ruth were born I went all-out on postpartum cloth pads.

They were 10* more comfortable and I just loved them! The hospital will usually provide you with mesh undies, several massive disposable pads, and a floppy disposable ice pack.

It’s basically like wearing a loose diaper, a trash sack, and a cold hard brick in your pants. Nothing stays in place and everything slides around.

Postpartum Cloth Pads - Natural Postpartum Care Products

Postpartum cloth pads snap directly around your panties so they can’t fall off. These cloth pads are SO much softer on an “already sensitive” area. There are 0 nasty chemicals like dioxins to worry about as well.

Some Etsy makers sell postpartum pads with ice packs that you can insert directly into the pad for additional comfort. This would prevent the ice pack from slipping around like the disposable ones.

Only use the ice pack no more than 24-48 hours after birth and only 15-minute increments as it can interfere with your healing.

Now I’ve already written everything you need to know about Postpartum Cloth Pads; including how to use them at the hospital.

Postpartum  Perineal Healing Spray - Natural Postpartum Care Products

6. Perineal Healing Spray
I made my own healing spray after doing a lot of research on natural skin healing remedies. This spray is a miracle worker down there!

You can spray it directly on “uhmm” or right on your postpartum pad after going to the restroom or during a pad change.

This spray is all-natural and extremely soothing. It also helped to speed up my recovery several times!

You can also use this healing spray for sores, hemorrhoids, chapped skin, rashes, etc.

Great For Stinky Babies!

And the best part is, you can continue to use the spray as a cleansing/healing spray for your babies.

Usually, after my babies have had a bowel movement (and after wiping them clean) I would use the healing spray. It takes that nasty poopy odor away while preventing or soothing diaper rash.

Just make sure the essential oils are ok with baby’s skin. You may want to consult your physician first.

The hospital will provide you with Dermoplast which will help numb the area but it doesn’t act as a cleansing or healing agent. Sometimes they will also give you witch hazel pads for hemorrhoids.

My postpartum healing spray soothes hemorrhoids since half of it is made from witch hazel.

If you don’t want to make your own healing spray Earth Mama Organics makes a great Herbal Perineal Spray (aff link) and an Organic Perineal Balm. (aff link)

Sitz Bath - Natural Postpartum Care Products

Mini Baths For Your Downstairs

7. Sitz Baths & Sitz Bath Herbal Teas
A Sitz Bath (Amazon aff link) is a small plastic tub-like basin that you would emerge your perineum (the area between the vagina and rectum) in. Sitz baths are especially useful or recommended for people with 3rd to 4th-degree lacerations or who suffer from hemorrhoids.

When To Use:
They’re ideal to use after the first 24-48 hours but you can use longer. This helps to promote healing and help dissolve your sutures. You only need to use it for 3-5 minutes at a time and usually a few times a day.

Make sure the basin is clean and fill with lukewarm or warm water. You can add Epsom salts for added healing benefits or just use plain water.

This Tea Doesn’t Go In Your Mouth?

Earth Mama Organics and a few other places on Etsy actually sell Herbal Sitz Bath Teas (aff link) that you’d add to your sitz bath water. These teas provide added relief and promote faster healing. They are usually made with infused organic herbs and essential oils.

I purchased a sitz bath from Amazon and received one for free from the hospital. My best friend and mother SWORE by their sitz baths.

Personally, I never ended up using my sitz bath because my perineal healing spray did such a great job. I healed up quickly the second and third time around.

However, I probably would’ve benefited from the sitz bath on my first labor as I was completely train-wrecked down there!

8. Heating Pad
This one quickly became a must-have for me. I never knew just how miserable after-pains were until after giving birth.

Spoiler alert, it’s basically like labor contractions without all the hype!

After my second delivery, the hospital refused to give me anything other than ibuprofen so I was in great pain. The only thing that relieved me was when they brought me heated towels to lay on my belly.

Unfortunately, as soon as they cooled off my pains would return. Sorta like that creepy dude who keeps slipping into your DM’s.

Luckily, my MIL purchased me a cheap heating pad which also helped me after my third birth.

Here’s a better quality pad than the one that I received. (Amazon aff link) Heating Pad

I currently use my heating pad when I’m sick, have sore muscles, or when I’m having menstrual cramps. This is why heating pads are a great investment for your natural postpartum care kit!

Mortar & Pestle - Natural Postpartum Care Products

Mental Health

9. Natural Supplements & Oils
There are quite a few natural supplements you can take to help aid you through the postpartum period. I’m only going to focus on one because I found it had the best reviews.

If you’re dealing with real postpartum depression please talk to your Dr. and seek help. These supplements are here to help but may not be the complete answer if you’re severely troubled.

So the supplement I want to mention is called Joy-Filled (Amazon aff link) by Happy Healthy Hippie. It’s a plant-based supplement for depression and anxiety. It also has the best reviews on Amazon.

Please remember to consult your physician before taking this.

If you’re planning on breastfeeding you’ll still need to take a good prenatal to get all of the nutrients that you & baby will need. I recommend This One. (Amazon aff link) It’s organic/non-GMO. Your Dr. can also prescribe you one.

Essential Oils

Diffusing essential oils is another great way to relax the mind. Lavender is proven to reduce stress and anxiety naturally. I recommend Young Living oils because they own their own farms, are USDA certified, and very high-quality oils.

Be careful when using oils if you’re breastfeeding. Read the back of the labels.

I generally stuck to diffusing lavender and sometimes grapefruit as it helped to lift my spirits. If I was having an especially anxiety-filled day I’d dab a little lavender oil on my wrists and neck.

Earth Mama Organics - Organic Heartburn Tea

10. Natural Postpartum Care Teas
Herbal teas are a great way to reduce bloating/inflammation or stress and anxiety, promoting relaxation.

There are several teas that I found that you may want to try out. Each tea has different benefits. Some help with calmness, others help ease premenstrual/postpartum hormonal symptoms and some even help with milk supply.

Earth Mama Organic Teas (Affiliate links)

This one is great for PMS, postpartum, and premenstrual symptoms.
Organic Periodic Tea

If you need to feel a sense of calmness you may try this.
Organic Peaceful Mama Tea

Got Milk? Or not?
Organic Milkmaid Tea

If you’re trying to quit breastfeeding try this one to help ease the transition.
Organic No More Milk Tea

If you’re soon having a baby I wish you well in your delivery and hope this post has helped you prepare in some way. Please leave me a comment and let me know which natural postpartum care product you plan on using or have used.

Natural Postpartum Care Products That Help Heal Faster

If you liked my post, here is an image you can pin or share!

Best Nursing Pads

If you’d like to know what to pack in your hospital bag, click the image above!

Create A Carnival Themed Birthday Party On The Cheap!

Create A Carnival Themed Birthday Party On The Cheap!

Are you digging the carnival themed birthday party but don’t want to spend a small fortune on decor? Wanting to throw a party that will be a hit with tots and the adults?

My second child’s first birthday was done in the carnival theme and it was a hit. I can’t wait to show you how to pull off your own carnival themed birthday party for cheap!  

Affiliate Disclaimer:

This post contains affiliate links. This means that if you click on any of my fun-little-links and purchase something, I'll make a small commision at no extra cost to you. It's a win-win for both of us right?

I’ve been friends with the owner of Bobee Party Supplies for a while. She was kind enough to send me two of these adorable banners to use for Abrams’s birthday party.

You can find more party supplies from her website Bobeeinc.com.

Getting Thrifty

I went to the dollar store and found four little bows to use at each end of the banners. They added a more finished look to the edges. I also found two of the gold balloons at Walmart for a buck apiece. The bows and the balloons only cost me four bucks!

Pro-Tip: Save money by keeping your party supplies to use for future parties.

Making A Big Visual Impact For Cheap

Another thing I purchased was regular balloons. I wanted to fill them with helium but that went a little above budget. We ended up tying some of them to the chandelier and letting the others loose around the house.

We kept to our themed carnival colors of red, blue, and yellow. The balloons added a nice pop of color while simultaneously entertaining the little ones.

To make the carnival tent, we also picked up some cheap red and white streamers from Walmart. We hung them around our chandelier in a striped pattern. That gave our party a really fun vibe.

Let’s Talk About The Food

Carnival Themed Birthday Party - Food Ideas

Let me tell ya, the food was simple yet delicious. You don’t have to be a great cook to impress your guests.

My go-to dishes when throwing parties are veggie trays, fruit trays, and punch. Just make sure you cut up some of the grapes longwise for the little ones. I’ve read too many horror stories of children choking on regular-sized grapes at parties.

I used these (Amazon aff link) versatile silicone collapsable bento boxes for my fruit and veggie trays. They come with lids, hold a lot of food, and have a spoon/fork combo attached.

Asher always used them as lunch boxes for moms day out. We love using them especially since they’re non-toxic. I washed off some of Asher’s toy zoo animals that we already had lying around his room to add a little charm.

Pro-Tip: Look for ways to utilize what you already have for decorations. One time I used Asher’s toy trucks as balloon weights for his truck-themed birthday party. 

Carnival Themed Birthday Party - Food Ideas

One of my favorite party dishes to make is my cheeseball recipe I got from a co-worker years back. It’s always a hit for work functions, parties, etc.

Because I love you guys, I’m going to share it with you! 🙂

Pineapple Nutty Cheeseball Recipe:

This is a very easy, make-ahead recipe you can do for any party. Here is everything you will need:

  • 2 8oz packs of Philadelphia cream cheese
  • Two tables-spoons of finely chopped green pepper (reserve the rest)
  • One table-spoon of finely chopped onion
  • 1 teaspoon of seasoning salt
  • Small package of sliced almonds (honey roasted is best)
  • One small can of crushed pineapple (drain and use about a handful)
  • Box or two of your favorite crackers 

Finely dice a slice of onion and a two to three slices of your green bell pepper. Add your softened cream cheese, seasoning salt, and the drained crushed pineapple to a mixing bowl. Mix well then scoop into a round circle into a serving plate. Cover and put in the fridge for a couple of hours or overnight.

Before you get ready to serve add the rest of the green bell pepper slices to the bowl. Top with your almonds and add some crackers.

Tip: You can make a sweat/savory marinade with the left over pineapple chunks and onion.   

That’s it, super easy folks! 

Carnival Themed Birthday Party - CheeseBall Recipe

For A “Punch” of color

Like I mentioned earlier, punch is one of my staples when throwing a party. To continue with the carnival/cotton candy theme I went with my old rainbow punch recipe. 

I used rainbow Sorbet ice cream, Hawaiian punch and Ginger-Ale. (you can also use 7up).

About 10 minutes before the party starts, go ahead and sit out all of your food including the cake. Then prepare your punch. 

Smokies Are Life

For the meat all I did was throw a couple packages of little smokies in a crock pot and added a bottle of Head Country bbq sauce. I had it on low for an hour or two and it came out delicious. 

This was my first time making little bbq smokies for a party. I can’t believe I’d never tried it before, it took almost 0 effort to make! 


It’s All About The Cake

We have a local grocery store that custom made these cakes for us for around 20 bucks. They didn’t have any carnival themed birthday cakes so I asked if they could make me one.

I whipped out a few example pics from Pinterest and they did exactly what I had in mind. Don’t be afraid to ask if you want your cake to look a certain way. The main cake was topped with bath toys so I got to reuse those! 

Unfortunately, Abram wasn’t too thrilled about the results. We also made the intelligent decision to have his party around nap-time… Oh well, lesson learned. 

Carnival Themed Birthday Party - Cake and Cotton candy

Last Minute Details

I received this (aff link) Travel Clothesline for cloth diapers from Diaper Dawgs to try out. Instead of hanging diapers, I put together little bags of cotton candy and printed off some pictures of Abram’s first year.

These photos were literally printed off 25 minutes before the party! We have a Walgreens right by us and you can do it super fast and cheap from their app.

We also picked up some cool carnival lollipops from the dollar store and set them out as part of the decor. The lollipops and cotton candy doubled as decoration and party favors which saved us even more money.

Carnival Themed Birthday Party

So to pull off the party we probably spent about 70-100 dollars which includes all of the decorations and food.

Everything turned out really cute and we all had a lot of fun which is what it’s all about!

I hope you enjoyed my decoration ideas, don’t forget to sign up to my email “nest” and get your Free Carnival Printables! 

Carnival Themed Birthday Party - Free Printables
Carnival Themed Birthday Party

If you liked my post, here is an image you can pin or share!

Best Nursing Pads

If you’d like to learn about the Spray Pal Sprayer Shield, click the image above!

Pin It on Pinterest

Share This